Blog Image

Bristol 408

Restoration

In this blog I will share my experiences during restoration of my Bristol 408. The car has been in bits and pieces for many years. Engine, gearbox and rear axle are rebuilt earlier. The journey begins with preparation of the body and chassis before the car is going to the panel beater.

Separation – the end

Dismantle of body and chassi Posted on 23 Mar, 2010 22:28:08

After we had solved the earlier problem it was easy to slide off the rear body section.

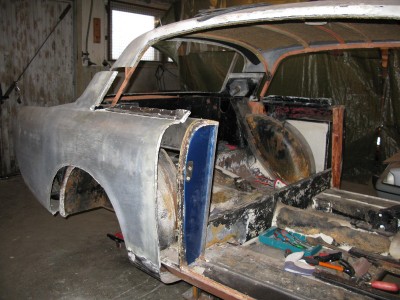
The worst areas regarding corrosion were as we suspected/knew the egde of the wheel arches.

The roof and boot sections looks flimsy compared with the doorpost and wheel housing.

The End

Conclusion: Leave the rear body section on. Unless you not are in desperate need of therapy or the car is in a very bad state. For me it´s therapy. Growing up i an engine repair shop it makes me calm to see thing being completly dismantled.


Separation – beginning of the end

Dismantle of body and chassi Posted on 23 Mar, 2010 21:48:40

After I had drilled out or sawed-off everything I could think off it did still seem quite impossible to get of the rear body. I had to ask the the panel beater for advice.

He did look at the problem from several angles.

After an hour or so, he came to the same conclusion as I did. It´s the sharp angle. It´s to sharp and there is to much material. There must have been a very skilled person who had filled in an extra strip with aluminum. Without leaving any sign.

A few days later I dared to try to bend out the upper side panel of the body. I soon found out that we were right. The sharp corners at the rear side windows had to be finished with the body in place.


Separation 3. Front end.

Dismantle of body and chassi Posted on 08 Mar, 2010 22:24:12

I had unfolded the rear end of the front wings from the A-post earlier. The folded edge at the air intake had I decided to leave until the bonnet frame were disassembled.

The picture shows the rivets at the sides of the bonnet frame. The rear rivets, towards the bonnet hinges, are steeel. The frame is also rivetet to the bulkhead and welded to the front crossmember.

The bonnet frame and the electrical equipment to an old elevator. Note that the rear parts of the wings and the scuttle are still in place.


Separation 2

Dismantle of body and chassi Posted on 07 Mar, 2010 18:57:02

Most of the body is riveted on the chassis. Part of the boot is shown i picture.

But there are some areas where the aluminum is folded onto the chassis.

It´s not easy to unfold them. One have to be patient and work slowly, but even then is the possibility to damage the edges high. To be frank. Some parts have to be replaced.

Some of the tools I used. The C-spanners are modifyed for this application.


Separation 1 (chassis and body)

Dismantle of body and chassi Posted on 21 Feb, 2010 20:47:32

I decided to do a “real restoration” and take of the body. The plan is to take it apart in three parts, front, roof and rear. I guess (from position of welds) that this is the reverse action to what they do at Bristol Cars.

As you can see in the pictures have doors, windows and interior already been disassembled. It´s possible that I will show this later in an other category.

First things to dismantle are the rain channels. They are attaced with several screws conceled under putty.


Real Winter

Dismantle of body and chassi Posted on 29 Dec, 2009 19:33:24

All work postponed due to cold weather. Will be back next year.