


In this blog I will share my experiences during restoration of my Bristol 408. The car has been in bits and pieces for many years. Engine, gearbox and rear axle are rebuilt earlier. The journey begins with preparation of the body and chassis before the car is going to the panel beater.
After we had solved the earlier problem it was easy to slide off the rear body section.
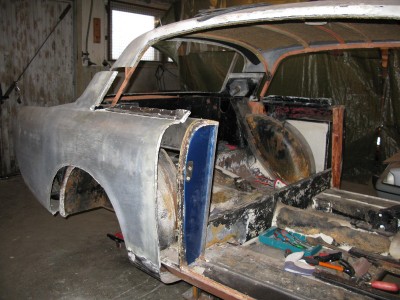

The worst areas regarding corrosion were as we suspected/knew the egde of the wheel arches.

The roof and boot sections looks flimsy compared with the doorpost and wheel housing.


The End

Conclusion: Leave the rear body section on. Unless you not are in desperate need of therapy or the car is in a very bad state. For me it´s therapy. Growing up i an engine repair shop it makes me calm to see thing being completly dismantled.
After I had drilled out or sawed-off everything I could think off it did still seem quite impossible to get of the rear body. I had to ask the the panel beater for advice.

He did look at the problem from several angles.

After an hour or so, he came to the same conclusion as I did. It´s the sharp angle. It´s to sharp and there is to much material. There must have been a very skilled person who had filled in an extra strip with aluminum. Without leaving any sign.

A few days later I dared to try to bend out the upper side panel of the body. I soon found out that we were right. The sharp corners at the rear side windows had to be finished with the body in place.
